*First written in 2003

I won’t pretend that this is for the beginner. You must have some experience with silversmithing tools – namely a piercing frame, soldering small bits of silver to larger pieces, and use of files. You will also need a basic silversmithing tool kit of:
- A piercing frame and saw blades (2)
- 2.0 flat file
- 2.0 crossing file
- silver soldering equipment
- bench peg
The key to good frames are silver coin mounts – they are made the same way to hold coins as the first frames were jigged to hold lenses. They come in a variety of sizes and for a variety of thicknesses. I got mine from Cookson Precious Metals.
The spectacles I aimed to make are early period, 1550, simple one bar across the nose, tied to the face by string looped around the ears.

First I removed the scroll mounts – you could leave them on if you like the decoration, but it’s a bit frilly for me and a bit 17th centaury. I heated the frame holding onto the scroll with heat resistant tweezers until the solder gave and the frame fell off. If you melt the frame at this point – ur buggered.
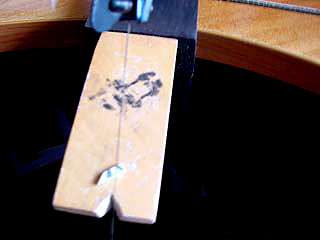
On a spare bit of 1.5mm sterling, I marked out two trapezoids which would become the joining mechanism for the rims and pierced. These will get soldered across the opening of the rim, then cut through to allow the lenses to be inserted and finally bound with fine wire to close the rim.

With a crossing file give one end of the trapezoid a curve so that it makes a better seal when it comes time to solder it to the rim. If you do the wide end, then you will need to file notches in the sides to secure the wire with – as in these specs further down. If you curve the short end, you won’t need to cut/file notches as in the more elaborate specs (examples further on). File notches into the sides of the trapezoid. When it comes time to bind the frames closed, this is where the fine wire will catch and hold the rims closed.

Make two jump rings – these can be double for extra security and soldering surface. Solder the trapezoids across the rim openings – effectively closing them off. Make sure to solder them in the centre of the thickness – you may need to prop the trapezoid up on a 2p (old copper!).
Rotate the rim by just under ¼ and solder on the jump ring in the centre of the thickness of the rim. The lacing ring should be just above central on the eye – not like modern glasses where the arm is at the top. And the trapezoid should be at an angle to the nose where the nose is the straight side of a right angle triangle and the trapezoid piece is the opposite corner – that way it doesn’t scratch your cheek whilst wearing.
Remember! You have a right and left rim!!!

Here’s the tricky bit!
Trace your normal specs on a piece of paper. This is going to be the model for your nose piece. Make a cross exactly centre over each lens (see photo). A normal pair of frames is made and fitted to your head so that each rim is centred exactly over your pupils. This is so that the curve of the lens is over your pupil so that you suffer the least distortion and get the best advantage of the lens.
Your eye MUST see through the centre of each lens. When you measure and model the bridge, you must make sure that each rim remains exactly over each cross or your optician will reject the frames. Or worse you will make yourself seasick, vomit or give yourself migraines when wearing the spectacles (whilst this affect may be very period, it may not be ultimately desired…)
I stuck the rims to the tracing with double sided sticky backed plastic (v bp!). Then I used a bit of blue tack to get the arch/top of the nose. It was then simple to draw a simple curve on the tracing from rim to rim just above the highest part of the arch to make the pattern for the bridge.

Solder the bridge to the rims making sure you have the lacing rings are level and the bridge is in the middle of the rim thickness (supporting it on a couple of 2p’s or a trivet…)
Check the fit and location of the centres!

Finally, pierce outwards from inside the rim perpendicular to the rim, opening the rim for the lens.
Secure the rim by taking a length of binding wire and wrapping it around the trapezoid. The lenses should have been made by the optician to fit the circumference EXACTLY. You can further secure the lens by gluing the lens in place (if it is a bit thinner than the thickness of the rim – you don’t want it to rattle) either with proper putty or with a drop or two of superglue (dries invisibly).
Because silver frames are posh – and we aren’t! I oxidised the frames with professional oxidising solution (also from Cookson’s) to a dirty black. I also did a calculated job on the finishing of all the edges, cut the bridge unevenly, and put some file and saw cuts in to look worn and crude.
I’d show you a photo of how they look on – but I don’t allow images of myself to exist. Plus, I wore them for two weeks in the Kentwell foundry – can we say patination?
The design is a combination of two popular designs of the time. They looked nice together so I left them! The fashion police may object soon so I may pierce one out…

The lenses are tinted the lightest possible bottle green. They are also flat fronted – meaning the front surface is NOT curved. This does give a little distortion, but you do get used to it.
A short note on what I view as a quality resource:
I go by painting, engraving, woodcut or archaeological evidence ALONE. Second-hand information by a drawing of a portrait or conjecture is not acceptable. Thus, resources like Norris – I just plain don’t use – not even to refer to. What is to follow will either be quoted from original documents (sometimes quoted by an author – but with the original reference intact) or scientifically dated archaeological evidence.
This is merely a fraction of the ammount and reading that I have done. Some of the reading is sooo obscure that listing it on the bibliography would be – well, silly. And the Uni library only lets me photocopy 3% of any book – this was what I was able to smuggle out – yes – the copyright police may be on me at any moment. But, this subject is in itself so obscure as to be very funny if they DID come after me.
Spectacular Museum – Wonderful site with real images of actual specimens – BUT impresise dates. Good general knowledge – but without quoting sources or precises dates makes this as an entire whole – needing backup.
Spectacles, Lorgnettes & Monocles – By D C Davidson & R J S MacGregor – Published by Shire Publications – 2002
Fashions in Eyeglasses by Richard Corson ISBN: 0720605776 – out of print everywhere…
To continue on with the research check out, Medieval – Jacobean Spectacles: A Visual History